- How To
- Nail Polish
- Community
The 8 Best Tips for Creating Instagram Reels With Your Nails
July 23, 2022
Hello Picture Polish fans! It’s Jennie Shaw, and I’m back for another round of the Social Media Series! Today, we’re talking about the bane of many creators’ existence (mine included). Yes, I’m referencing the unofficial new preferred content method on a platform designed for pictures: Reels.
Love them or hate them, the fact remains that algorithms favour video content. And if we’re to believe Instagram’s research, it’s how people prefer to consume content. This post isn’t a how-to because there are lots out there already. Instead, I want to share tips to make your creative process easier while maximizing your efforts. Like with all social content, lighting is a crucial element. If you don’t have a lighting set up or what a refresher, check out my first article.
Nail reels mainly consist of tutorials and finished manis or a combination of the two. If you’re just beginning your reel journey, I encourage you to release the pressure of jumping right into tutorials. They’re tricky in the beginning, and I recommend trying to enjoy the process as much as possible. Hopefully, by the end of this article, you’ll feel confident to try them. And if you’re a seasoned pro, there are some tips for you too. So let’s get started!
1. Recording and Saving:
Generally speaking, recording video outside of the app makes reels much easier. In fact, unless you’re lip-synching or doing precise transitions, there’s no reason to record your content within reels. Especially if you value your sanity haha! Dividing filming and editing into separate tasks can make reels feel less overwhelming.
Some tips about recording videos. First, aim for durations of two minutes or shorter. Briefer videos will allow you to edit segments down to one second or less. This step is crucial when timing clips to music or showing tutorial steps.
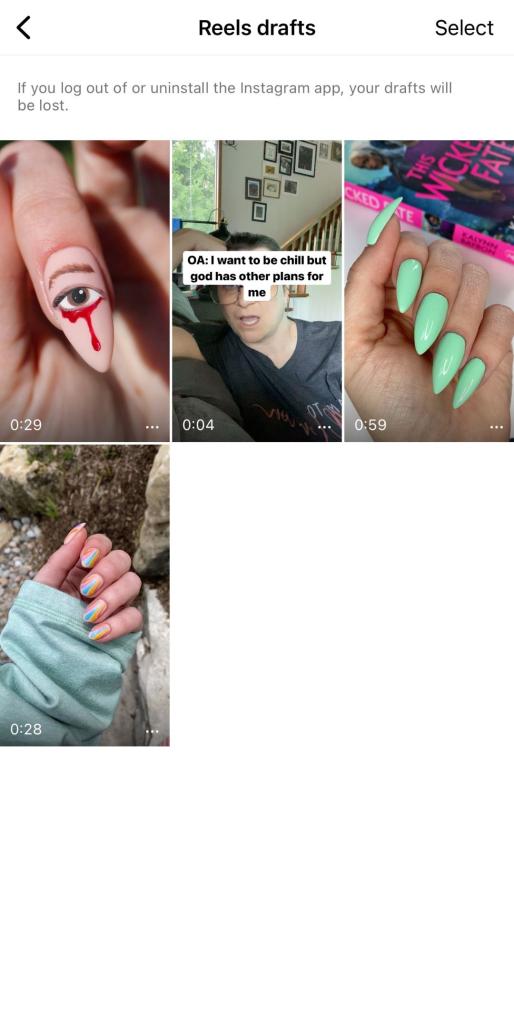
Also, I cannot stress this enough, save your drafts directly on your phone.
If there’s one thing I will keep screaming about, it’s this. Keep a copy of your hard work outside the app at all costs! Instagram can crash, stories can fail to load, and if you uninstall Instagram, your entire draft folder will disappear. Like backing up your work, save whatever you have in your draft folder to your photos. Having your own copy also allows you to load the video to other apps like TikTok.
2. Framing:
Depending on the reel you’d like to make, it’s essential to consider the frame. Tutorials are best shot close-up and the sky’s the limit for everything else. Portrait-style recording has more room than the grid, but the comments, caption, and engagement stats take up space. So keep in mind that those features will partially block the bottom area.
Keep as much towards the middle of the frame as possible, and you’ll be fine.
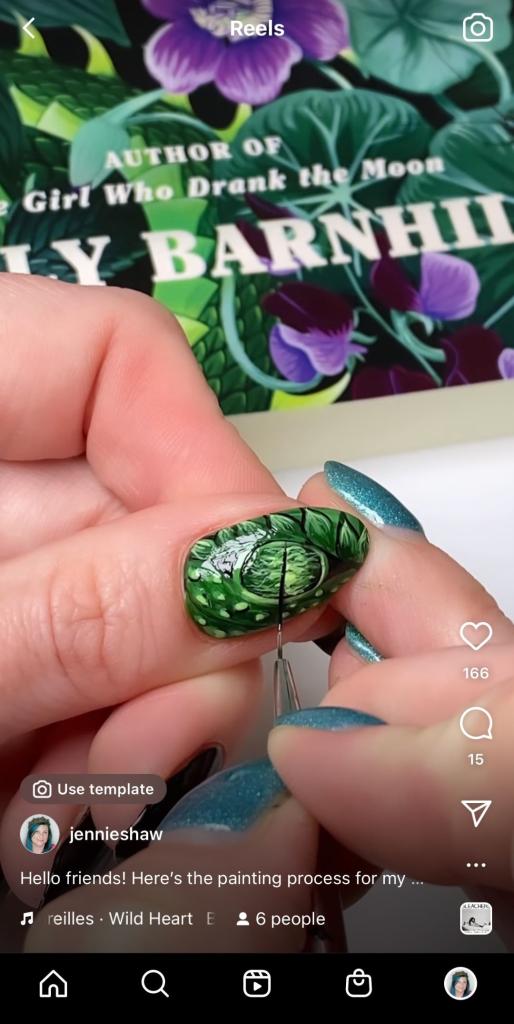
On the flip side, the larger frame means more space for your content when compared to the feed square. Take advantage of it! Add some props, like I do with my cover-inspired manicures! Or the bottles you’re using to paint your latest creation. I discussed props in length for the Social Media Series: Photography post, so head over for more ideas. The more visually attractive you make your reels, the better their chance of being viewed.
3. Speed:
Time-lapse recordings are quite popular, especially for tutorials, however some people don’t enjoy them. From personal experience, there are two essentials: a steady subject or a steady camera. Your time-lapse video will have Blair Witch Project energy without at least one of these. Nobody likes shaky camera work, and moving your nails in and out of focus can make some feel dizzy. Using a tripod will keep your phone or camera locked in place.
Just as time-lapse recording speeds up time, you can also use slow motion in your reels. This is particularly effective when capturing how nail polish can change in the light. Or for holographics that explode into rainbow happiness. Reels have an in-app recording feature that will slow down your videos, but you must record in the app. Lucky for us, many different apps outside of Instagram can perform this as well.
For a truly dynamic reel, try combining different speeds! This is when music can become a showstopping addition, and we’ll get to that soon. Play around and find out which speeds you prefer!
4. Transitions:
Transitions are where the fun and/or the terror truly begins. Transitions are exciting methods that change perspectives or make time elapse quickly. If you’re part of Generation Z, you’re likely well versed in transitions. For those who feel nervous, remember that transitions are optional! You can create fantastic reels without them.
That said, they look pretty awesome, and I think it’s valuable to get comfortable with a few. The easiest one is to zoom in and then zoom out. The idea is to force the camera out of focus, so it seems that details have changed in an instant. The technique involves bringing an object right up to the lens and then pulling back.
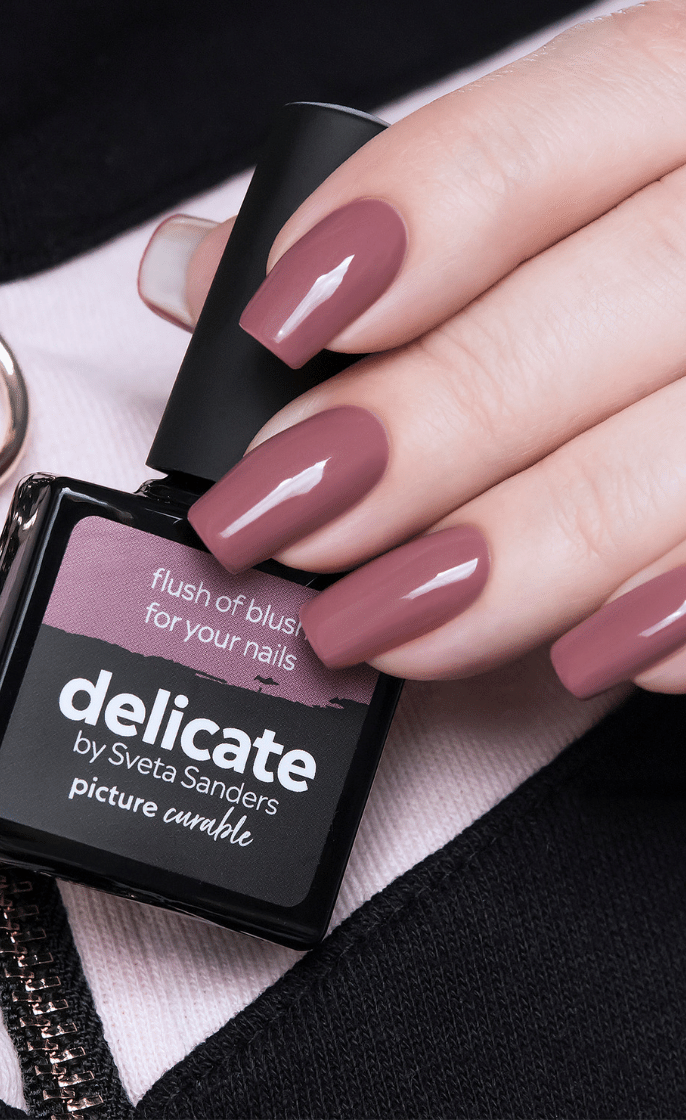
In this example, I’m using a bottle of Ziggy nail polish. I start by showing the full scene, then move the camera down until the lens rests against the bottle.
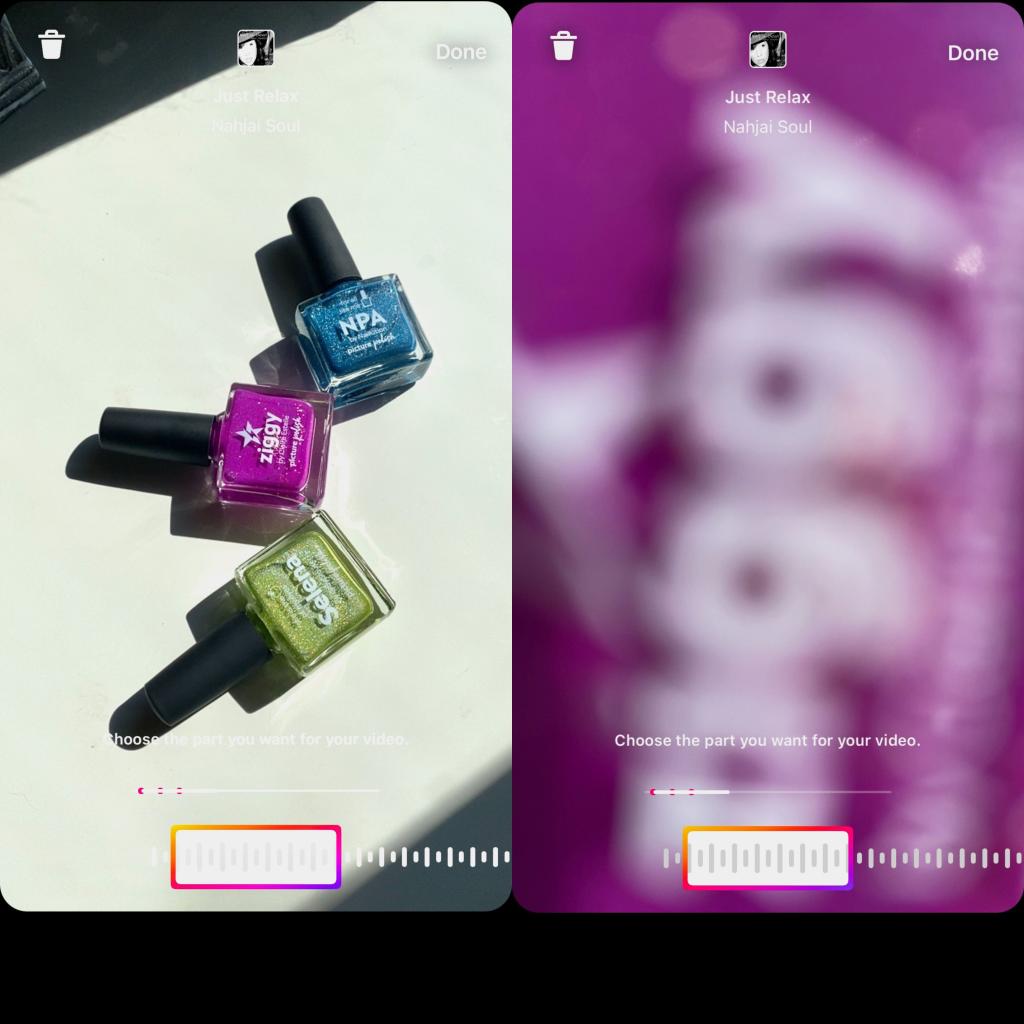
When you’re ready for your next shot, begin it in the same way you ended. In this example, that means starting with the bottle against the lens and then pulling away to reveal a new scene.
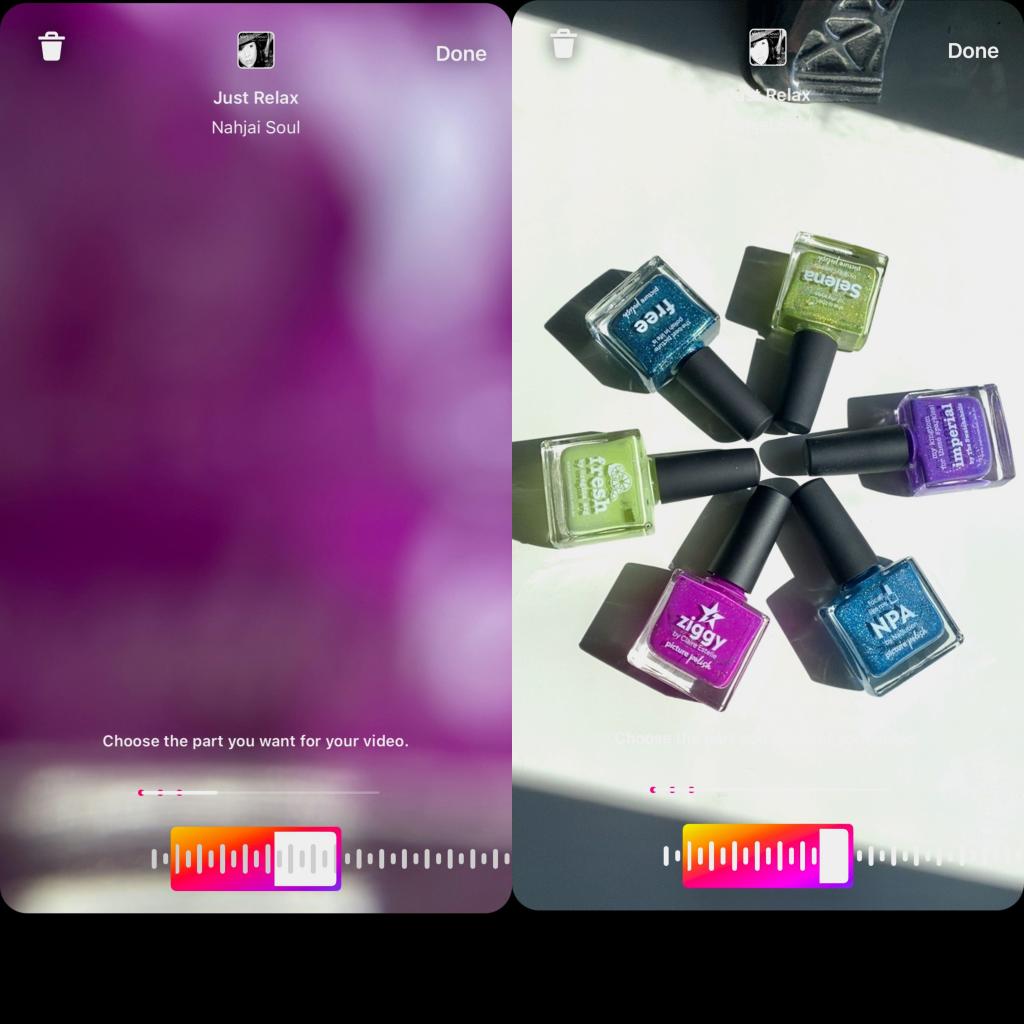
Use this transition to condense hours of detailed nail art into a split second or show naked nails to fully polished. For extra oomph, time this with your music selection, so the transition occurs on the beat.
5. Music:
As with most elements of life, music makes reels better. It can create a mood in an instant, which then enhances your reel. Instagram has an enormous music catalogue, and you can spend hours upon hours listening to 15-second previews. I know this from personal experience.
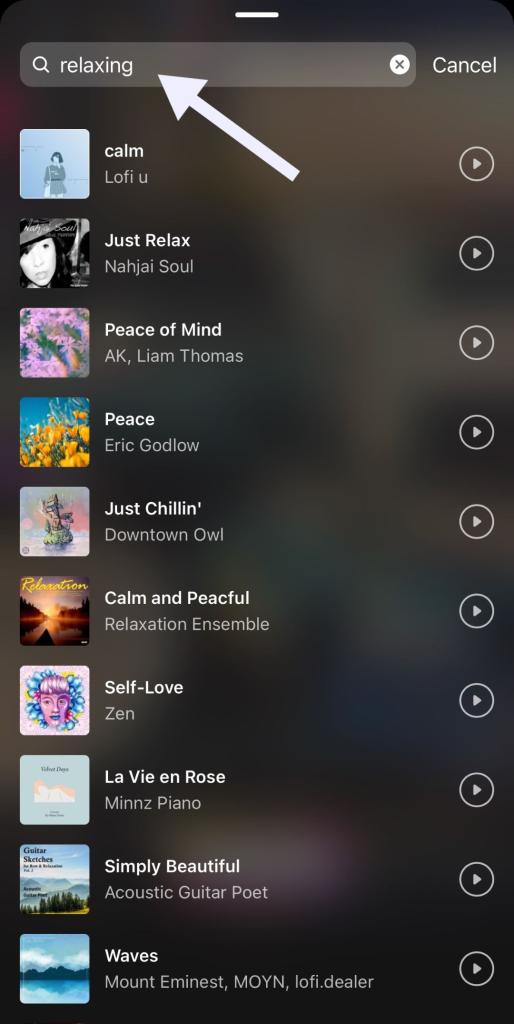
One way that cuts down on browsing is to enter a mood into the search bar. You’ll get songs with the word in the title, but also songs that suit the keyword. This is what I do when I don’t have a clear idea of the song I’d like to use. And holy cannoli, it’s saved me so much time. Plus, I get introduced to new artists.
Be warned that if you choose an indie version of a well-known song, you may face copyright problems later. Recently, Instagram has been cracking down on copyright infringements—which we fully support! But the downside is that the reel you spent time and energy creating will be blocked. Choosing the original artist for the song will significantly reduce this issue from arising.
6. Cover photos:
Once your reel has been created, choosing the perfect cover photo is the finishing touch. This can come from the video, or you can import a picture.
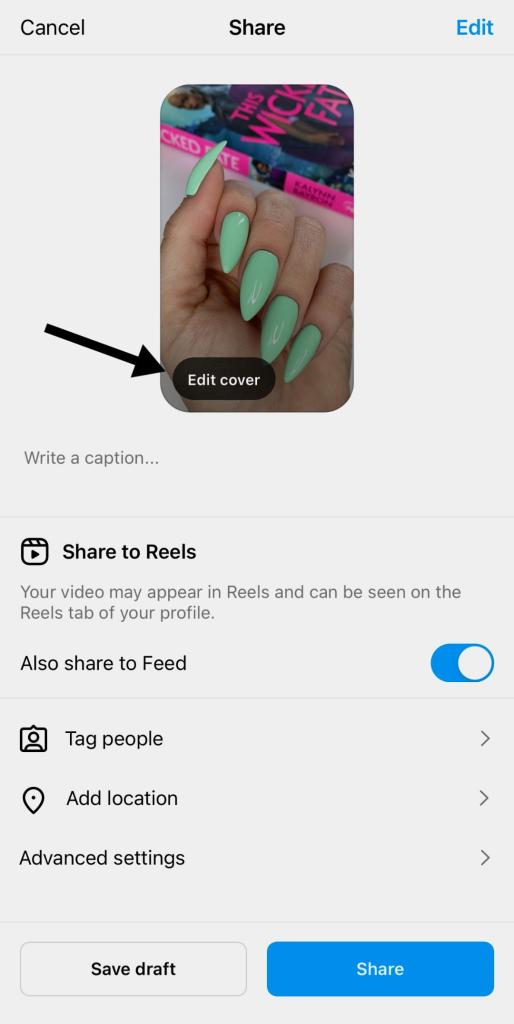
This seems simple enough, but don’t forget to hit “Profile Grid” to center your image in the square feed format.
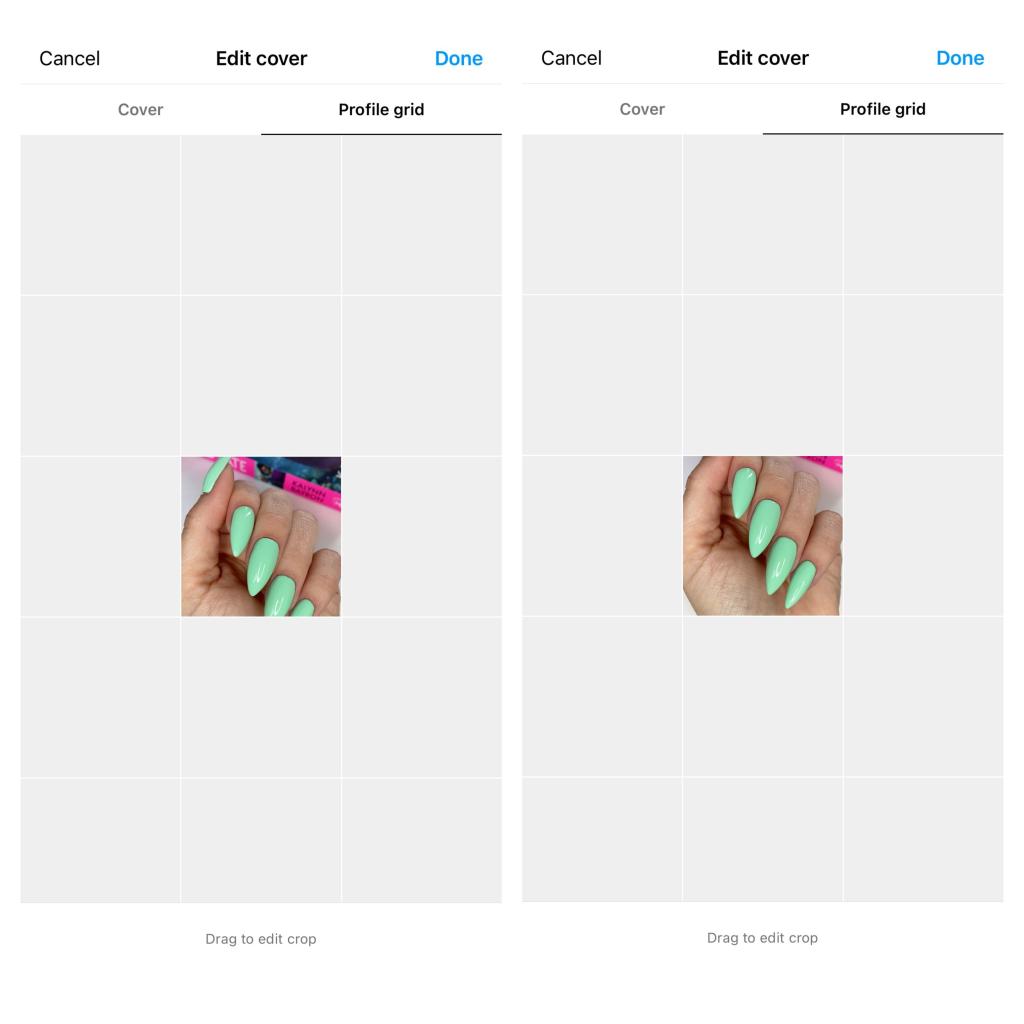
Pro Tip: Reels can be a temperamental app (remember to save your videos to your phone!) and cover photos are no exception. Sometimes, the cover photo resets when you load a draft. So make sure your cover photo is correct before posting, including checking the “Profile Grid” is lined up.
6. Hashtags:
To hashtag or not hashtag, that is the question. Instagram has gone on the record stating that creators should use five to ten hashtags in reels. Personally, I haven’t found much of a difference in engagement in regards to the number of hashtags. It’s more about quality, especially targeting any niche and specific hashtags. Think “#WitchyNails” or “#FloralNailTutorial” vs “#NailReel”.
7. Trends:
Often using original audio, trends can include music, lyrics, clips from movies and shows, or celebrity quotes. Not all trends work for nail videos, but quite a few do. By following active nail reel creators, you’ll be able to save their original audio tracks to use on your own post.
The organization of the original audio tracks is chronological, so finding specific ones can be a problem. If you immediately throw them into a draft and save it with a title, “OA: Woman yelling at the bee,” you’ll easily be able to find it later. The sooner you create the reel, the better, as trends change as quickly as a summer breeze.
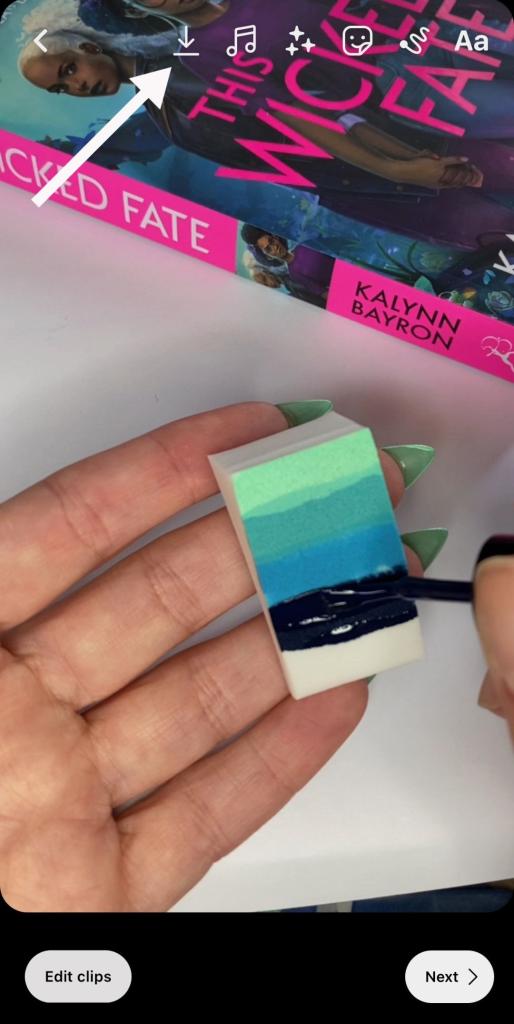
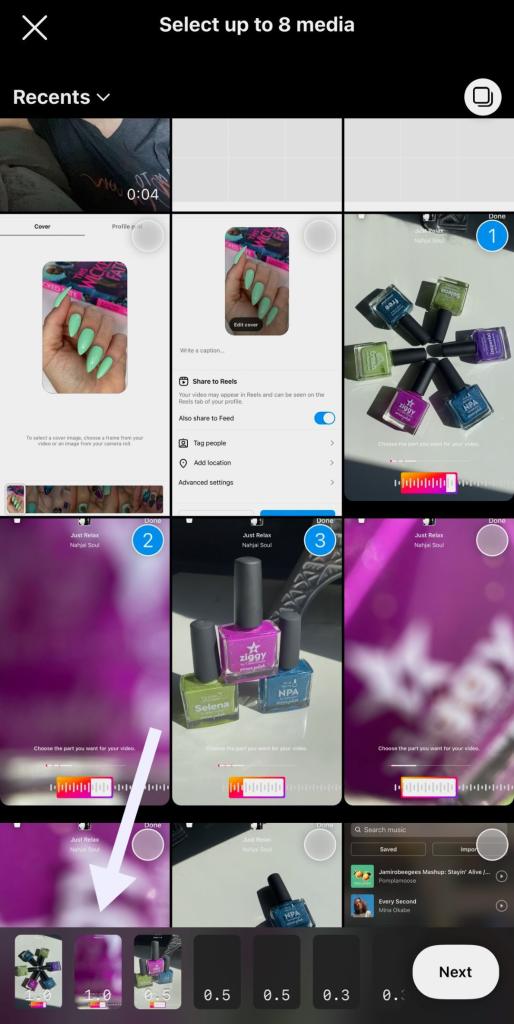
8. Templates
Templates are just like they sound: pre-constructed reel formats. Earlier this year, Instagram did creators a favour by introducing them. And quite right, really. They owed us.
Once inside Reels, look at the bottom and click “Template.”
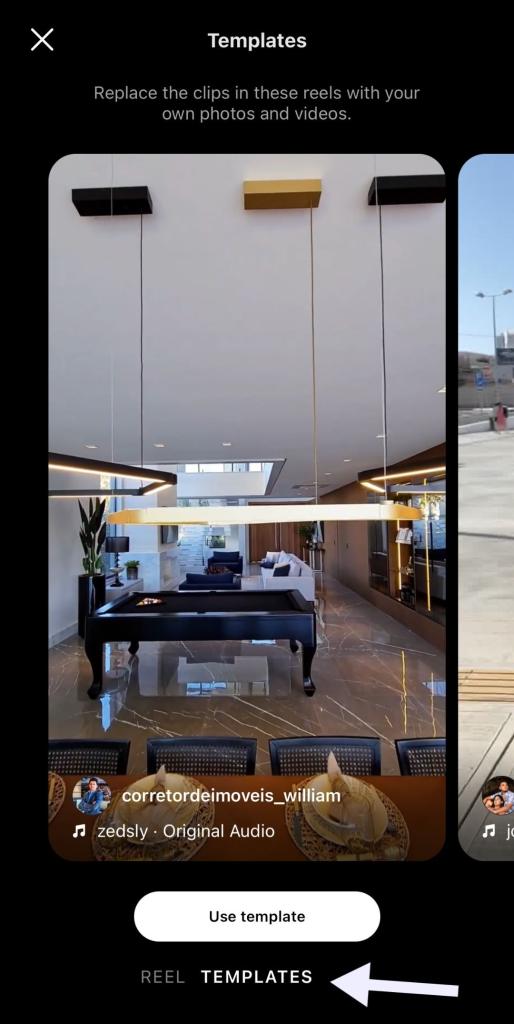
After clicking on “Template,” browse through the examples until you find one you like. The music is already loaded and queued up with spots to add clips that sync up.
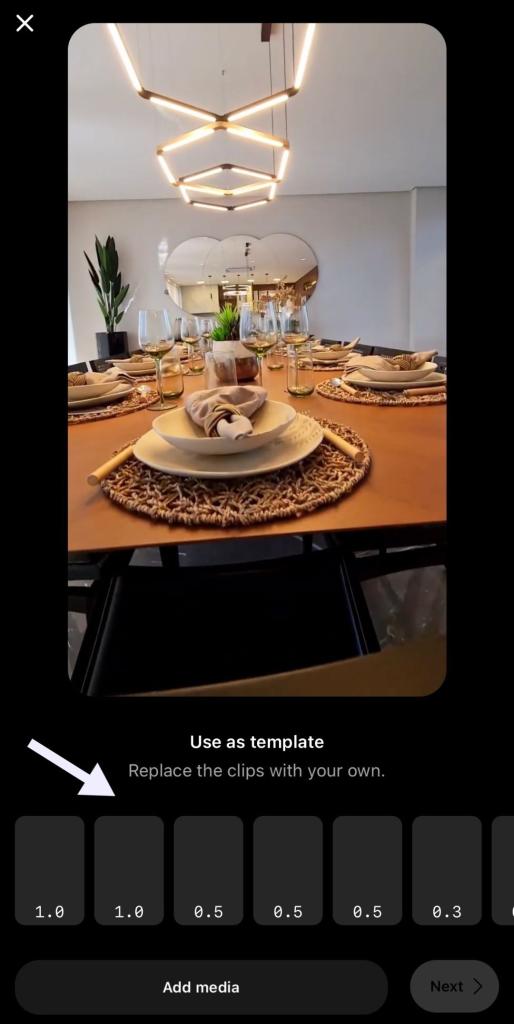
Add your pictures and videos where you want them, depending on the length, press “Next” and boom! You’re the proud owner of a pretty fabulous reel without doing the heavy lifting. Creating reels have never been this efficient!
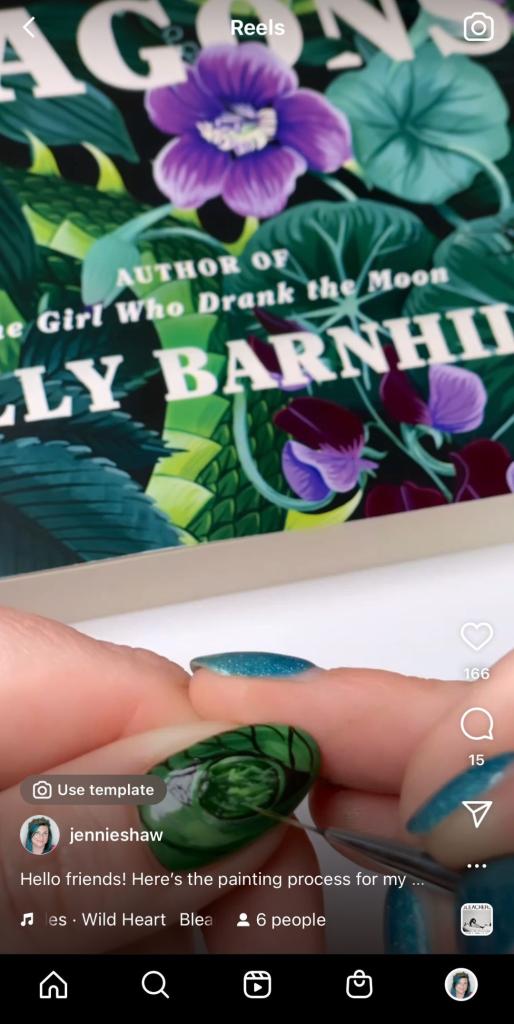
Pro Tip: If you see a reel you love, check if there’s a “Use Template” option towards the bottom of the screen. If so, click it and save into your drafts for another time.
I hope that you’ve found this article helpful! Reels can feel like climbing a mountain, but they’re worth the view in the end. Especially if you want to grow your Instagram account. What tips do you have for making reels? Head to @picturepolish to comment on the post and share your experiences!
Connect with Jennie on Instagram here.

Jennie Shaw is a writer and freehand nail artist. She is also an avid reader who pairs cover-inspired manicures with book reviews. Her work has been featured in Modern Salon, Nails Magazine, and on Goodreads. She lives in the Canadian countryside and can be found on Instagram @jennieshaw