- How To
What Are The 3 Most Essential Nail Art Brushes?
October 21, 2021
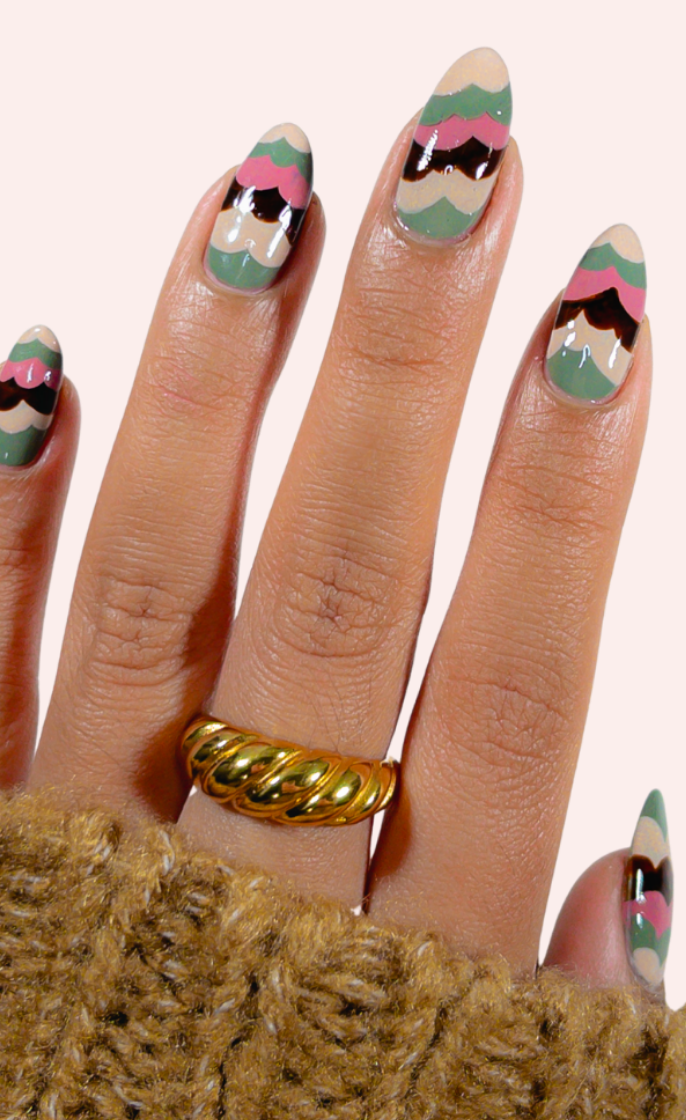
Freehand nail art is a fun way to express your personality and take your manicure to the next level. But it can also be quite frustrating. Having great a nail art brush can make a huge difference. There are many nail art brushes out there, and it’s easy to get overwhelmed when deciding which ones you need. Luckily, Picture Polish has three essential nail art brushes for freehand nail art designs. And, of course, crisp cuticle lines.
All Picture Polish brushes include a protective cap, so they will be safe no matter how you store them. The nail art brushes also feature a sleek metal handle, so with these three in your nail art arsenal, you’ll be unstoppable!
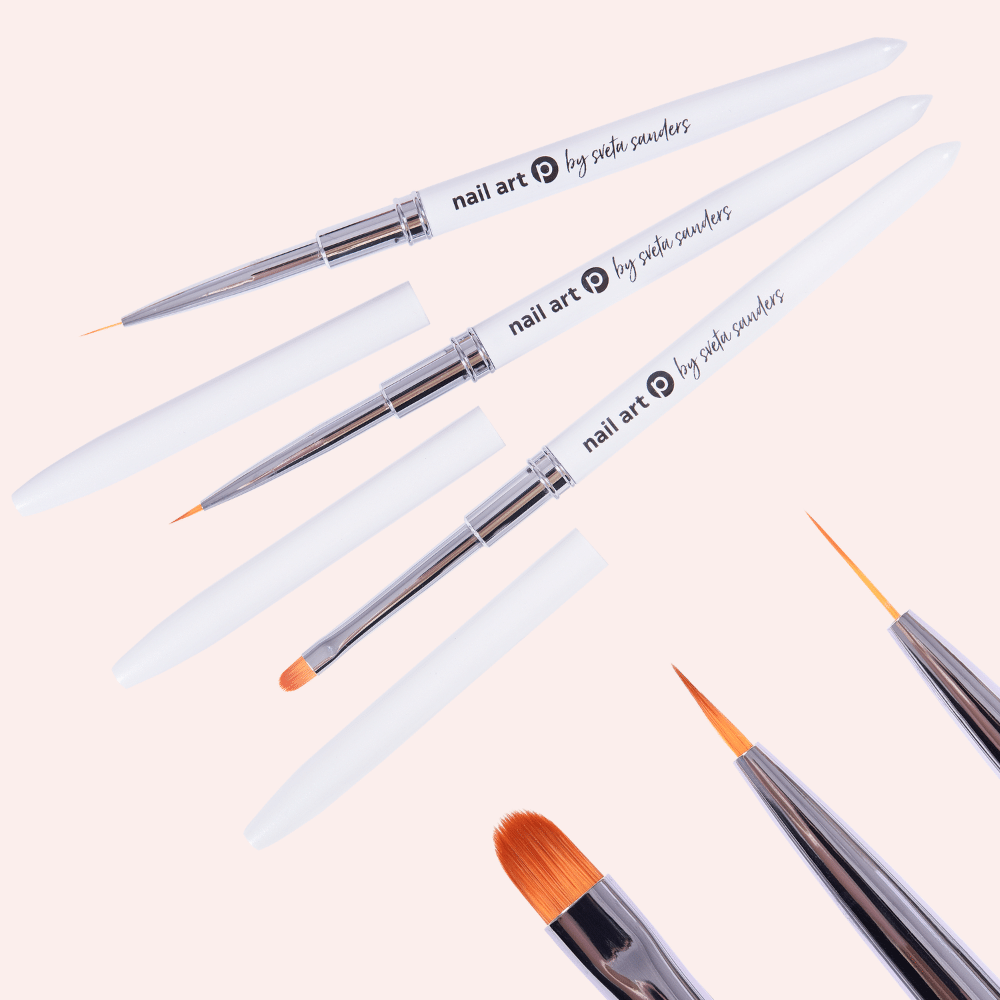
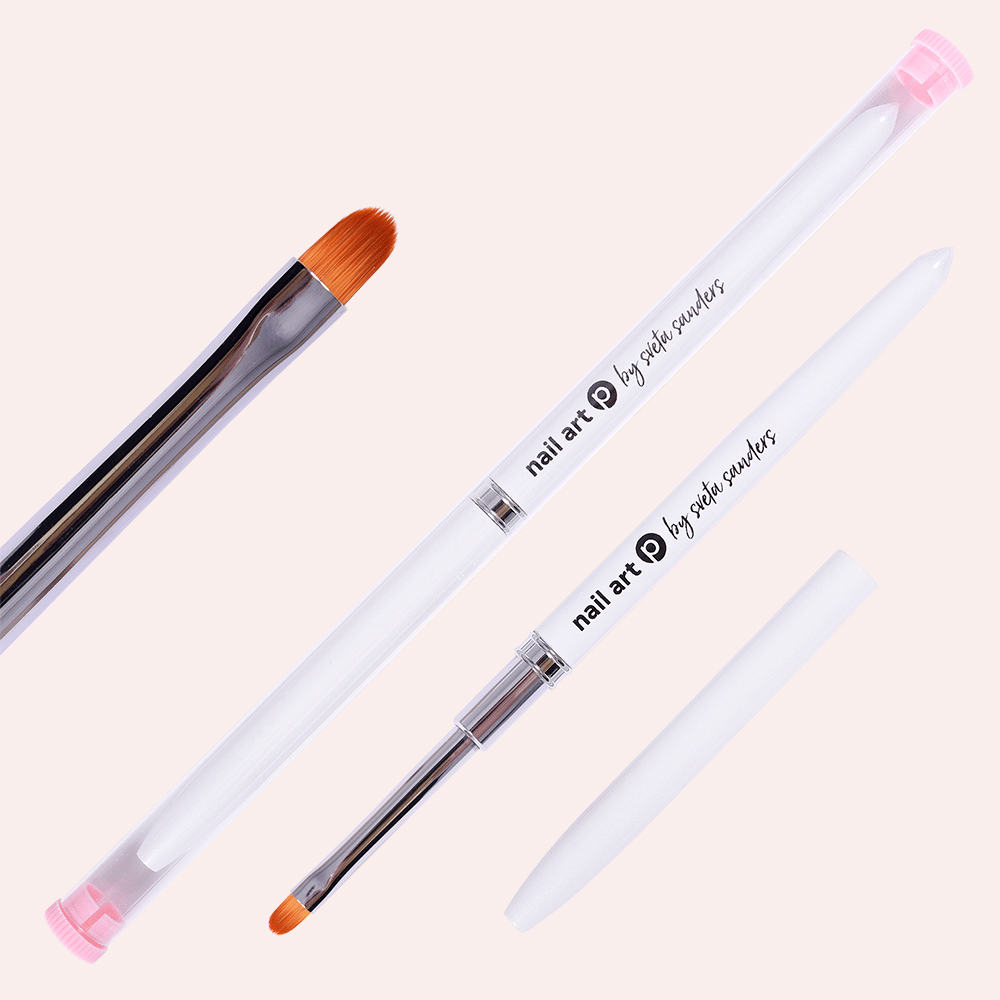
The Detail Brush
For those just entering the world of nail art or for seasoned pros, The Detail Brush is a multipurpose wonder. Featuring synthetic and tapered bristles, this nail art brush helps with painting tiny, intricate details. And the versatility of the 7mm length means that most designs are at your fingertips.
For smaller and precise art, focus on using the tip. That can mean angling the brush slightly differently or using a lighter touch. If you want to fill in a wider area, add more pressure to expand the bristles. This brush can do it all, from painting leopard spots to geometric patterns or whimsical lettering and colour blocking. After practicing, you’ll know what works for you, and before long, the Detail Brush will be your nail art BFF!
Pro Tip: The Detail brush works best using short strokes. Add polish close to the tip of the bristles, and then work your magic!
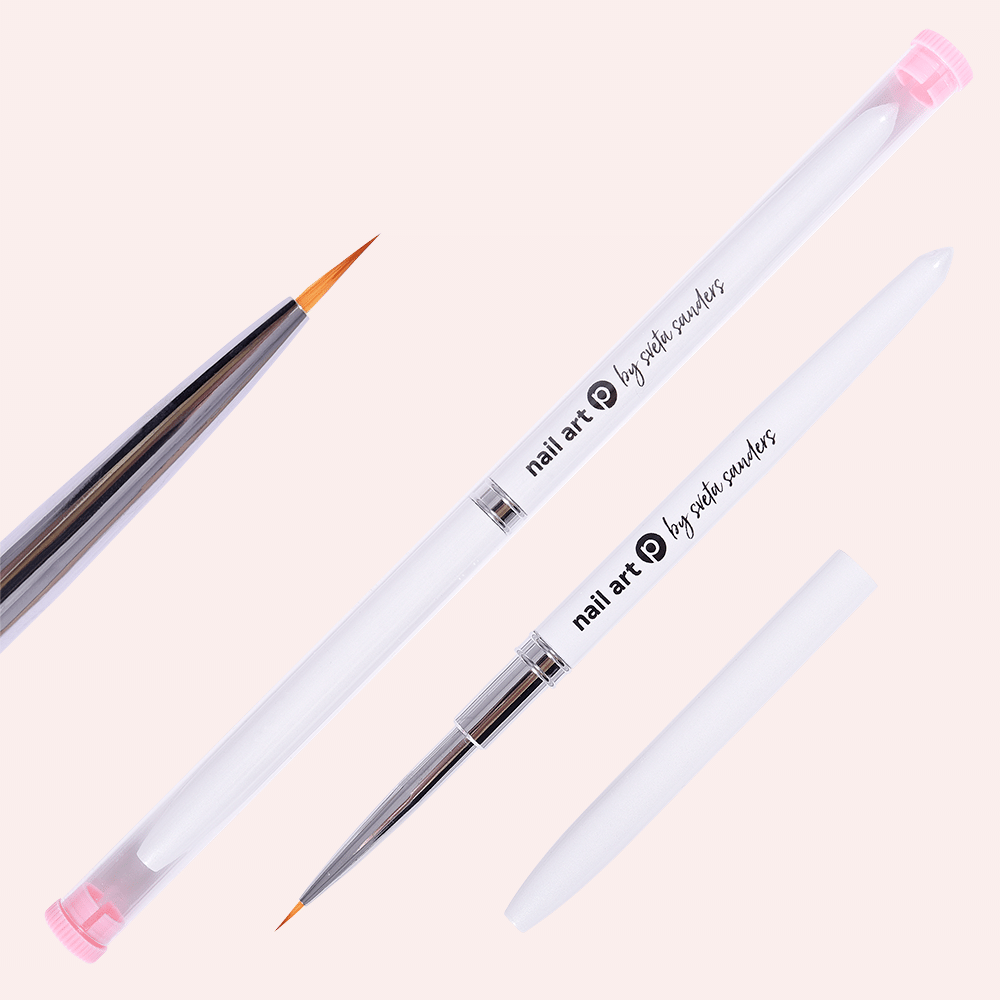
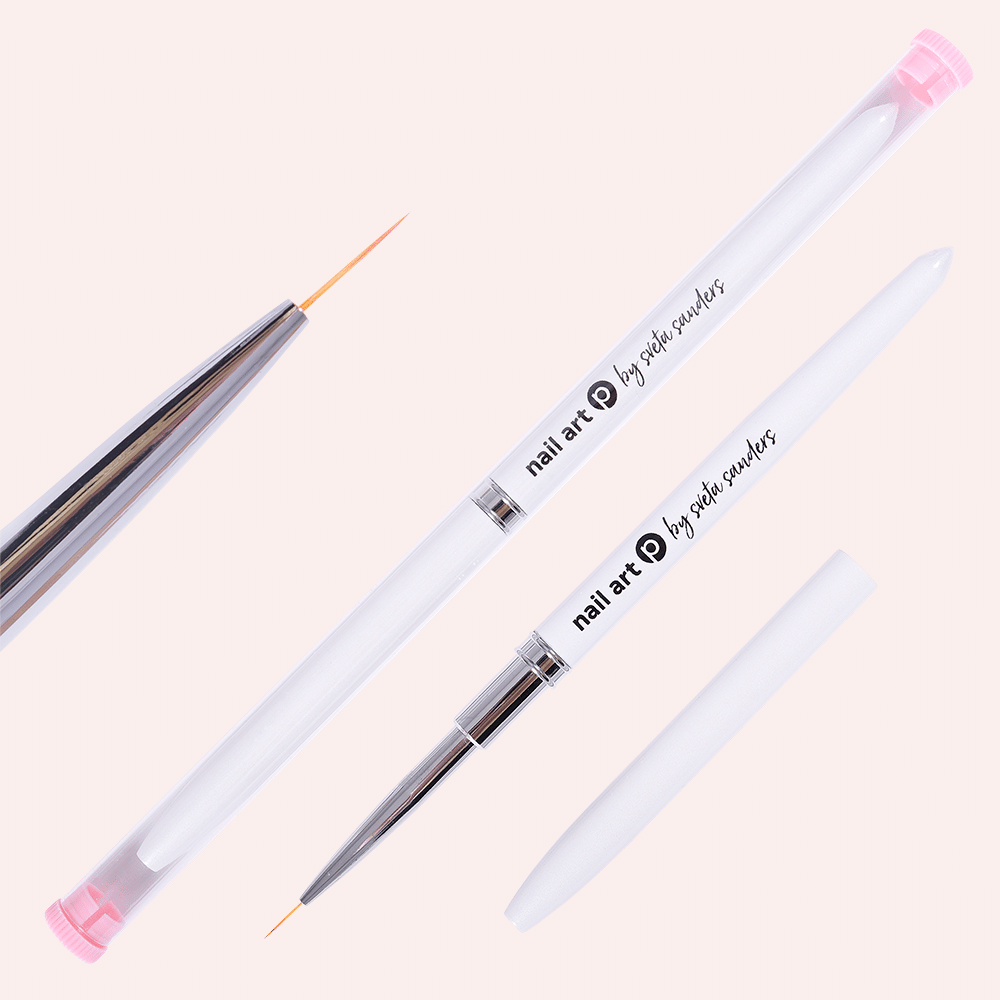
The Liner Brush
Painting freehand lines can stretch any NPA’s patience past their breaking point. The slightest difference in pressure can make the line bulge or smudge. Or things are going well, but then the brush runs out of polish. Nail art problems, right? Well, not if you have The Liner Brush!
The thin, synthetic bristles are 9mm in length, which means there’s lots of room to build up polish on the brush. But despite being named The Liner Brush, it also has multiple purposes. Tapered to a sharp point, The Liner Brush is extremely precise. For instance, it’s perfect for delicate details like star flares. And because not every line needs to be straight, don’t be afraid to outline a curved French tip. Or maybe even some abstract slashes. Once you get the hang of balancing pressure and the amount of polish, you’ll be making the lines of your dreams!
Pro Tip: Remember to move your fingers! Painting straight lines is all about angles, so don’t be afraid to shift your finger into a more accessible position.
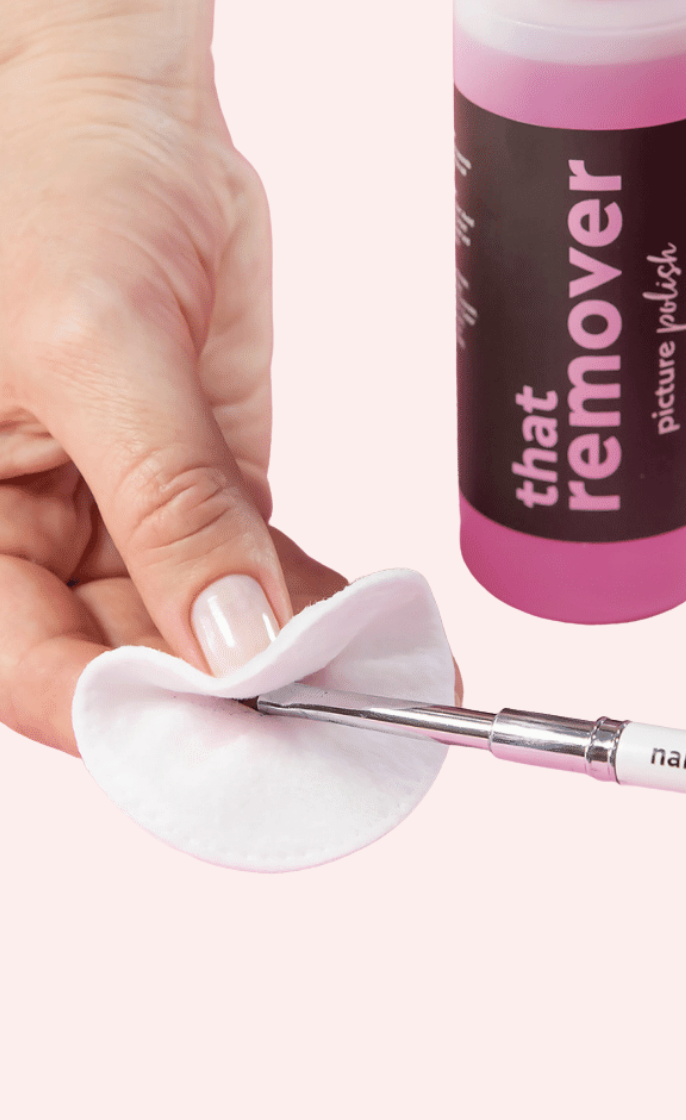
The Clean Up Brush
Even if nail art isn’t your thing, there’s one brush that’s genuinely indispensable: The Clean Up Brush. Yes, these brushes are the best-kept secret in manicures, and you definitely need one. It doesn’t matter how often you paint your nails. Mistakes happen. But that’s when The Clean Up Brush shines! Whether it’s an uneven cuticle line, a smear along the side, or a full-out gradient mess, this dynamo can help.
When painting your nails, you can either clean up as you go or wait until you’re finished. NPA’s choice! Either way, before you add a topcoat, it’s time to clean up your cuticle line. A clean and crisp cuticle line truly transforms a manicure. The Clean Up Brush has flat bristles with a rounded edge to fit easily into narrow spaces.
To clean your cuticle line, dip The Clean Up Brush in nail polish remover. Place the bristles against your nail on one side of your cuticle line as close as you can get. Follow the cuticle line to the other side. The 5mm bristle length has a stiffer feel, so less pressure is needed. Repeat until all of your cuticle lines are flawless, and then finish with a topcoat.
Pro Tip: Cleaning up your cuticle doesn’t have to be done in one swoop! If there is a lot of polish to clean up, remove the excess polish between strokes.
What to use:
Now that you know the purpose of the nail art brushes, you can decide which one is right for you. And if you’re interested in all three, there’s a convenient bundle available. If you’re wondering how to care for your brushes, you’re in luck! A new post is up next with details on how to keep your brushes in great shape. Until then, remember to tag @PicturePolish on Instagram! Especially if you use one of the PP brushes!