- How To
What Is the Difference Between Ombre and Gradient Nails?
Ombre nails and gradient nails are a confusing problem for Nail Polish Addicts. Which one is which? How can you tell the difference? Is there a consensus, or just a bunch of conflicting opinions?
Well, fear not NPAs, because this article is about to settle the matter once and for all!
Ombre Nail Designs
Ombre nail art uses various shades of polish within the same colour group. Each nail is painted a different shade and arranged from lightest to darkest.
An example would be for your pinky fingernail to be painted a soft baby pink like Ballet, ring finger in Blossom, middle Finger in Princess, Pointer in Candy, and then finishing with your thumb painted in New York.
Or to use a visual example with teal polishes (and matte topcoat):
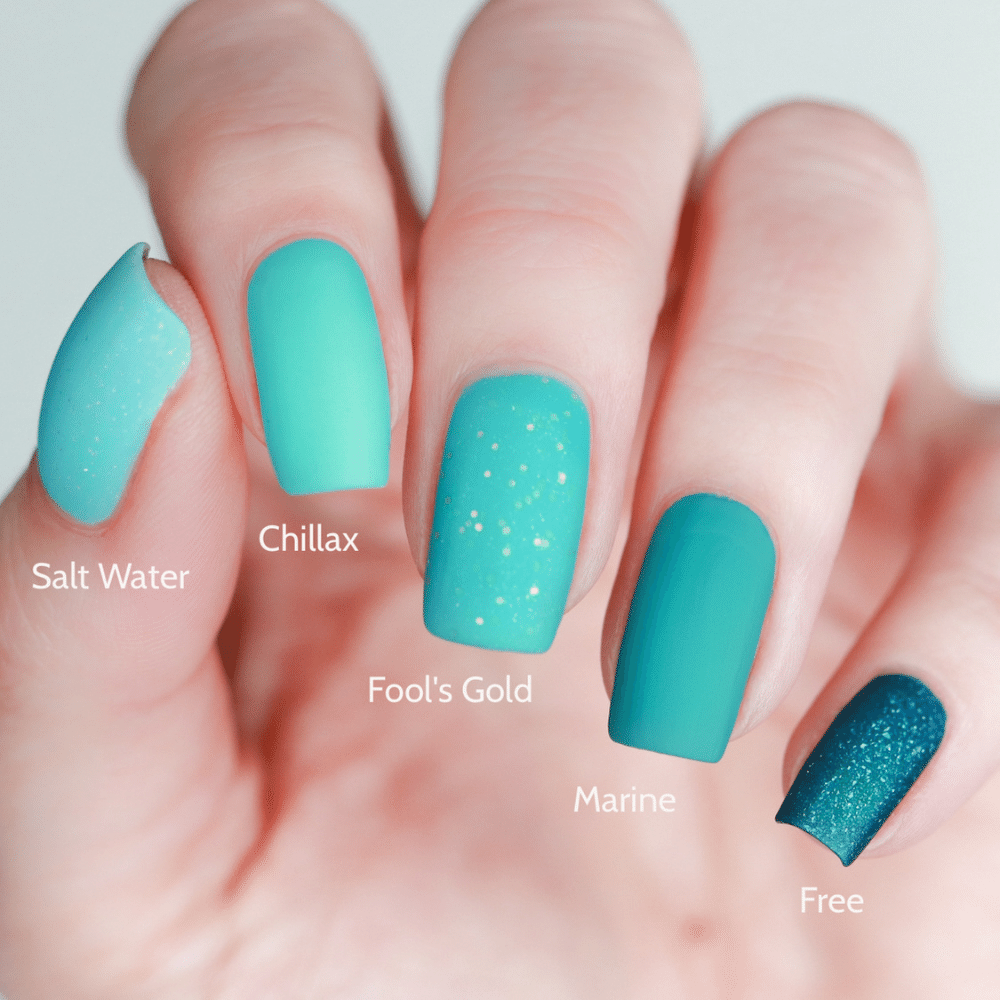
Some more observant NPAs may notice crèmes, holos, and multi chromes included in this ombré mani. Yes indeed! The only hard rule about ombré nails is to use the same colour and range the shades from lightest to darkest. Adding some sparkle or holo flakes makes the ombré even more eye-catching!
You can also choose where to place the lightest and darkest nails in your ombré mani, either pinkie or thumb. If you’re feeling adventurous, why not use both hands and include ten shades of the same colour for an incredibly epic impact? The more, the merrier! And don’t forget to use a basecoat and topcoat to extend the wear time and keep each nail shiny and glossy. Or chic and matte to mix it up a bit. NPA’s choice!
Gradient Nail Designs
Gradient nail art requires a little more work than ombré nails but is well worth the effort. While ombré nails have one colour on each nail, arranged from lightest to darkest shade, gradient nails use multiple colours on the same nail. Depending on the length of your nails, you include as many colours as you can fit. The only rule for gradient nail art is to have at least two different colours blended on the same nail. There are also several different gradient styles,
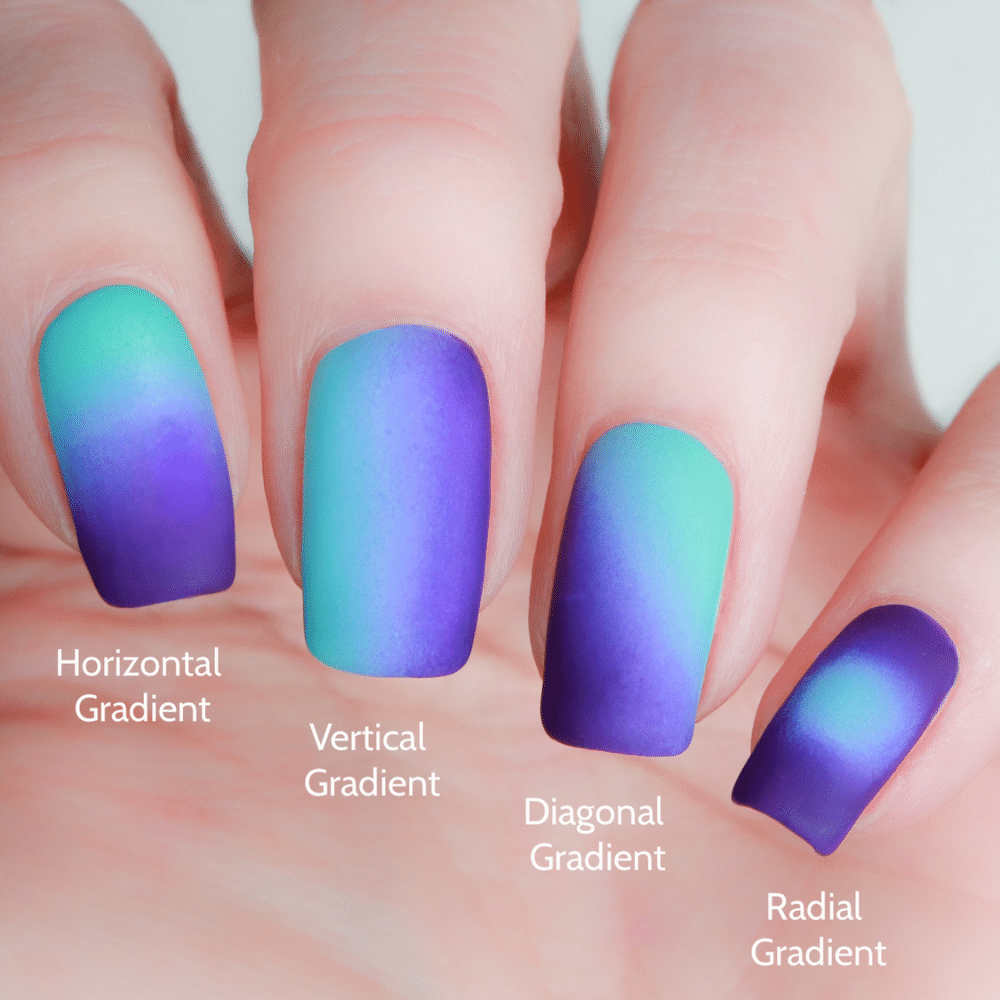
Horizontal: The colours blend from side to side.
Vertical: The colours blend from cuticle line to tip.
Diagonal: The colours blend at an angle from one side of the tip to the cuticle’s opposite side.
Radial: The colours are blended circularly, meaning the middle of the nail is one colour. Other colours blend outwards in a circular pattern. Often considered the most challenging gradient to apply because multiple coats must be applied in an exact way to keep the middle of the nail a solid colour.
Here is an example of each style of a gradient, using Chillax and Violet Femme:
Some polishes are better than others for gradient nails. Polishes that include holo flakes or glitter can be a challenge when using a sponge application process, but there are gradient brushes available to blend specialty polishes.
Pro Tip: for an even blend in between gradient colours, overlap their application slightly. After a few coats, this method creates a smoother blend!
Whether you use a brush or sponge to create a gradient, they can be messy, so prepare for some cleanup. Liquid Palisade, the original liquid nail tape, provides a barrier on your skin and cuticle that peels off. If any stray polish is left behind, The Clean Up Brush and a little bit of acetone-free remover will do the trick. As gradients require multiple coats, it’s best to let each coat dry before adding another. If the polish is too tacky, polish bits can be lifted off the nail and ruin the effect.
So now, only one question remains in the ombré vs. gradient debate: If multiple shades of the same colour blended on the same nail, is it an ombré or a gradient? Sources are inconsistent on this, which means that, unfortunately, some mysteries remain unsolved. But one thing is for sure; both of these looks are equally classic and stylish. The hardest part will be deciding which one to rock first!


